Clip It Together
To ensure that Nordfab Quick-Fit continues to be the “World’s Fastest Ducting,” we want to provide you with a few tips to help your installation go quickly, smoothly and safely.
|
Important Safety Information:
Always use proper safety equipment when installing Quick-Fit:
|
STEP ONE: Make Sure Your Shipment is Complete and Undamaged.
Inspect all boxes for outward damage BEFORE signing for receipt. The boxes should be strapped to a pallet, and not be crushed, torn or otherwise damaged. If you find damage, either refuse the shipment or note the issue on the receipt you sign. Unless you do this, any future claims will be virtually impossible to collect.
Additionally, before signing for your shipment, ensure that all boxes are accounted for. You can find the number of boxes in a shipment by checking the delivery receipt the driver will ask you to sign. Again, note any discrepancies before signing. Important safety note: Beware of the sharp metal staples used to seal the shipping boxes.
STEP TWO: Review the Packing Documents.
Nordfab packs boxes with the goal of reducing shipping costs, not in the order the parts are needed. Do not simply tear into the boxes and begin removing parts. At least one box on each order will contain Nordfab’s “Packing List.” Locate these documents before opening any boxes as it will give you details as to what is in each box. Avoid opening boxes until you need them to reduce the chance of parts being lost or damaged on site.
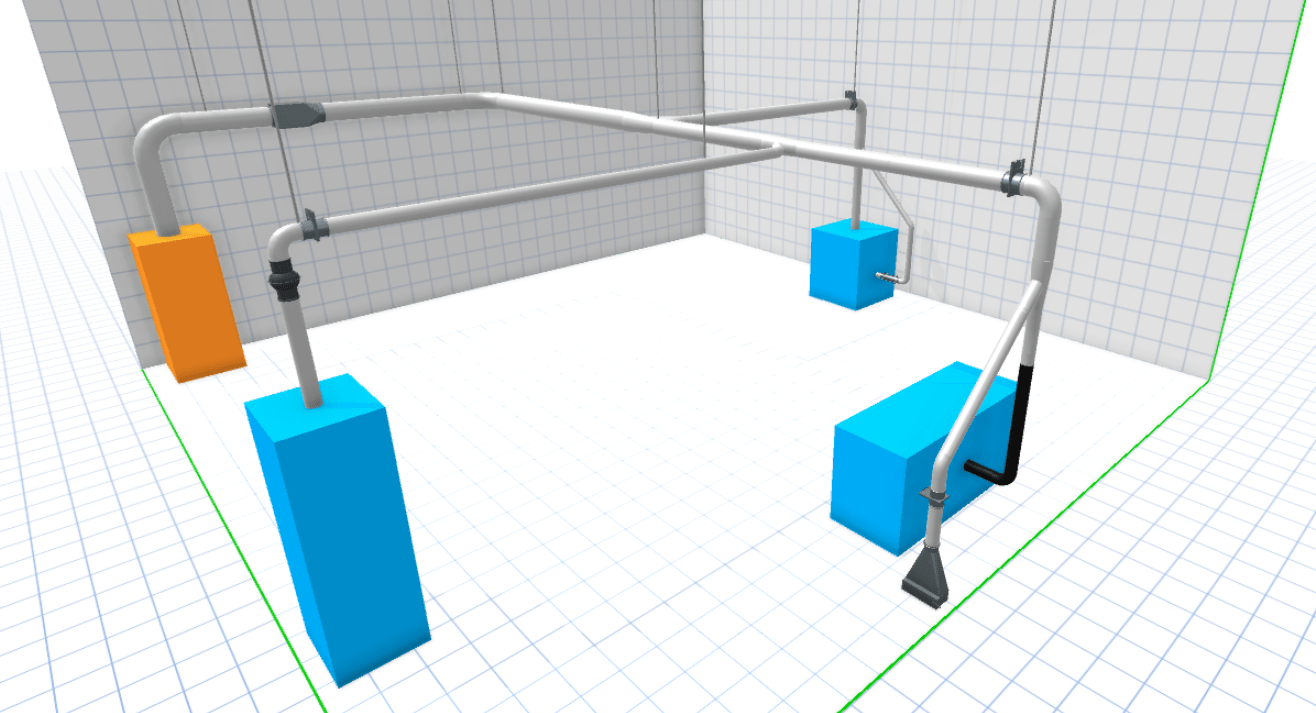
STEP THREE: Prepare to Install Your Ducting.
It is important for the installer to understand the layout the system designer planned for the ducting. Follow all local codes and regulations and note loading capabilities of structures to ensure the ducting is properly supported and that the building can carry the ducting system.
If your installer doesn’t understand the layout, he will not to have all the parts necessary to complete the job. If you do not have a clear understanding or drawing of the system you are about to install, please call the person who designed the system before you begin work.
 STEP FOUR: Laying out the duct.
NOTE: This is a step where you could possibly find that you do not have all the parts necessary to complete the job. In that case, contact your dealer immediately so that he or she can get the needed parts to you as well as help you verify that your layout matches the one planned by the system designer.
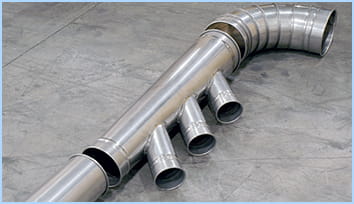
 STEP FIVE: The Slip Duct.
- Measure the distance you want to span.
- Cut the duct (NOT the QF Slip Duct) approximately 100mm shorter than the length necessary to complete the span. Make sure the cut is free of burs and that it maintains its round shape.
- Slip the cut end of the QF Duct into the Slip Duct. Clamp one end of the assembly into place. Be sure that the Slip Duct is downstream of the cut piece.
- Slide the QF Duct into the Slip Duct to the desired length.
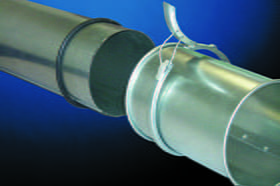
- Slide the o-ring across the rolled edge of the Slip Duct so that it is around the cut piece of QF Duct. Roll it until it is seated against the rolled edge of the Slip Duct. The O-ring will form a seal and provide a rolled surface for the QF clip to grab.
- Use a standard QF Clip to connect the rolled edge of the Slip Duct and the O-ring together.
Once in place, you can re-adjust the length of the assembly by releasing the clip and changing the length of the duct that is inserted into the Slip Duct.
IMPORTANT SAFETY NOTE: To ensure a strong, safe and stable system, there must always be at least 10cm of duct inserted into the Slip Duct.
Watch the video below for more information on installing a Slip Duct
STEP SIX: Supporting Your Ductwork.
Nordfab has a variety of duct hanging devices, but it is your responsibility to ensure the safety of all ducting. Please check with local agencies to ensure that your ducting is supported in a way that meets local codes. When determining the weight your ceiling and hangers must support, always allow for the ducting being 100 percent clogged with whatever material is being conveyed.
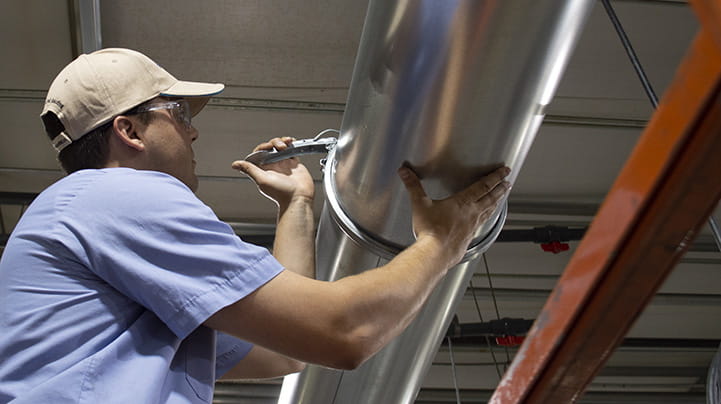
STEP SEVEN: Pre-Stretch Your Clips.
Nordfab QF Clips are designed to provide a tight seal, which means that they also require some pressure to close. By pre-stretching the clip around the rolled edge of a single piece of duct, you can make it much easier to close when you connect two pieces together.
IMPORTANT SAFETY NOTE: The ducting must be properly supported.
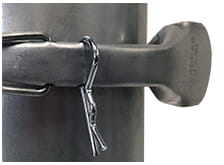 STEP NINE: Install the Cotter Pins.
IMPORTANT SAFETY NOTE: On very rare occasions, unpinned clips can spring open unexpectedly which can cause the duct to drop. Additionally, the handles on unpinned clips have been known to cause injury when they sprung open.